Photo editing is an important step for properly sizing your jewelry images and giving them a professional-quality appearance.Here are some steps on Editing Jewelry with PhotoshopStep 1.Open your image on Adobe Photoshop (CS1, CS3, CS4 or CS5)
Step 2:
Use the Path tool to trace your images. Using Path tool is the best way to trace your images. For more information about clipping or tracing images please click here.
Step 3: After tracing your images, time to change the colors of your jewelry. Using Hue and Saturation, you can manipulate the color of your steel jewelry. Press Ctrl+U.
Choose "Yellow" on the drop down.
Drag the Lightness to its maximum amount.
Again, Choose "Red" on the drop down menu.
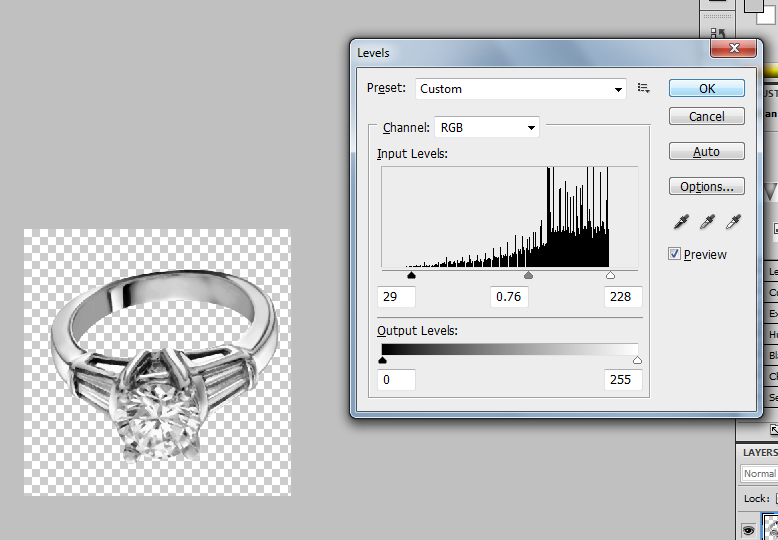
The reason why we change the "lightness" of reds and yellows of our images is that those colors are not import on the the steel jewelry. As I observe blue color represent steel, but not so much blue, yes we can Desaturate the image but the color blue will also remove resulting to pale gray color.Step 4 Now lets change the levels of your image. In Jewelry editing, always remember the amount of Highlights, Midtones and Shadows are very important. Just play with it and if you already find the right amount then go ahead.
Step 5:Unsharp mask play a big role on jewelry editing, specially involving gems. Gems have facets and we need to show each details of it.Duplicate layer
Unsharpen the upper layer.
After that drag down the upper layer and erase gem part of the lower layer which is now the upper layer. And you done


0 comments:
Post a Comment